API

Developer programming on a laptop at a desk
Microsoft VSCode – Tips and Tricks Round Up 731 312 Team DataMotion

Microsoft VSCode – Tips and Tricks Round Up

The dev team here at DataMotion has been sharing some hot tips and tricks to our social media channels to help your development processes, with our most recent tip series featuring Microsoft Visual Studio Code. In today’s entry to the DataMotion Blog, our team gathered those four tips and tricks, where we focused on how to integrate VSCode with a source control program (such as GitHub) so you have them in one convenient, easily-accessible toolkit.

For the uninitiated, Visual Studio Code is what developers call an IDE (independent development environment). Unlike Visual Studio, Visual Studio Code is a free, lightweight IDE, focused on quick development, building, and debugging. It has built-in version control, making it easy for you to save and update your code to GitHub, Microsoft TFS, or any other git centered, version control software. Though Visual Studio has additional features for more complex development scenarios, the lighter-weight VSCode IDE provides everything a developer needs for a simple programming cycle.

It appears this is exactly what developers have been looking for, as VSCode has over 14 million users worldwide and counting. According to ZDNet.com, that’s about 58% of all developers, including the developers here at DataMotion! Since VSCode is a widely used and very proficient IDE, the dev team has put some tips and tricks together to help you better use the platform. Before we begin, as quick production note that you may notice the below tips are slightly different than those we shared on social media. This is because we added GIFs from v1.65.2, and the original tips were from a different version.

(Note: These tips were created to help enhance an already-basic knowledge of the VSCode platform. For more information on how to get started with VSCode, visit their quick start guide.)

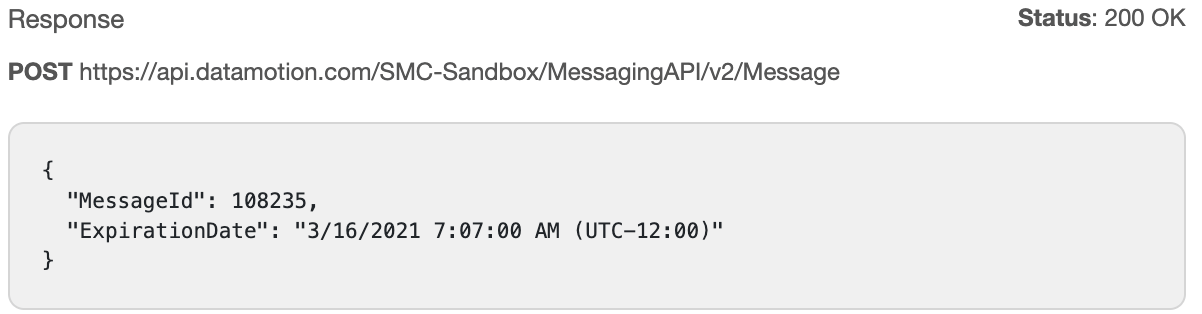
If you would like to follow along with us, feel free to download DataMotion’s GitHub repository/secure-email-postman-collection. You can clone the code here.

Let’s get started!

Hot VSCode Tips and Useful Tricks

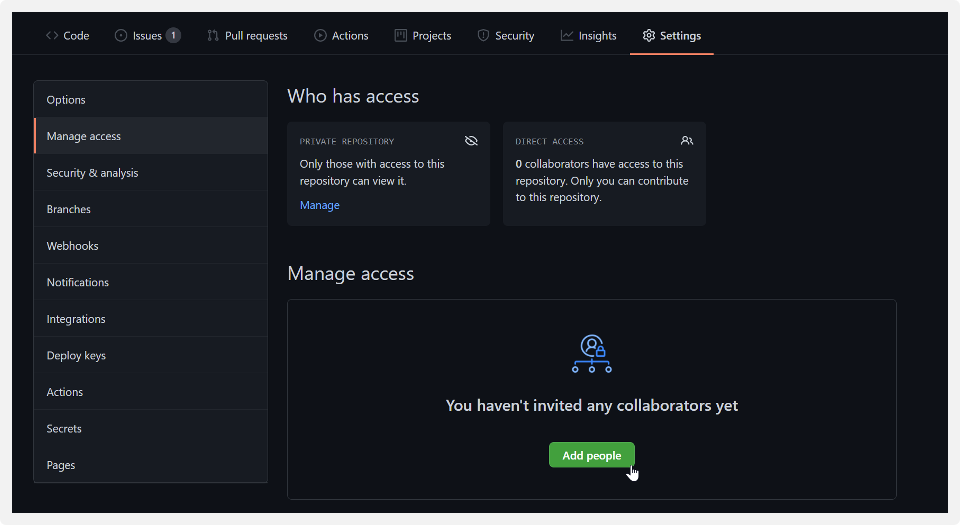
Hot Tip #1: Integrate Your GitHub Repositories Within VSCode.

Our first tip and trick for Microsoft Visual Studio code is to integrate your GitHub repositories within VSCode.

(Note: You can do this with other version control programs as well, but for this example and those going forward, we will stick to GitHub.)

To do this, open a new VSCode window and select “Clone Repository…”. At the top of the screen, either select your repository or enter the repository URL. You will then be prompted to choose a location to save your repository code locally.

There you have it! You have now pulled down a copy of your repo to save locally and work on. Next, we will review how you can easily switch branches within this repo as well as push changes to your source control program.

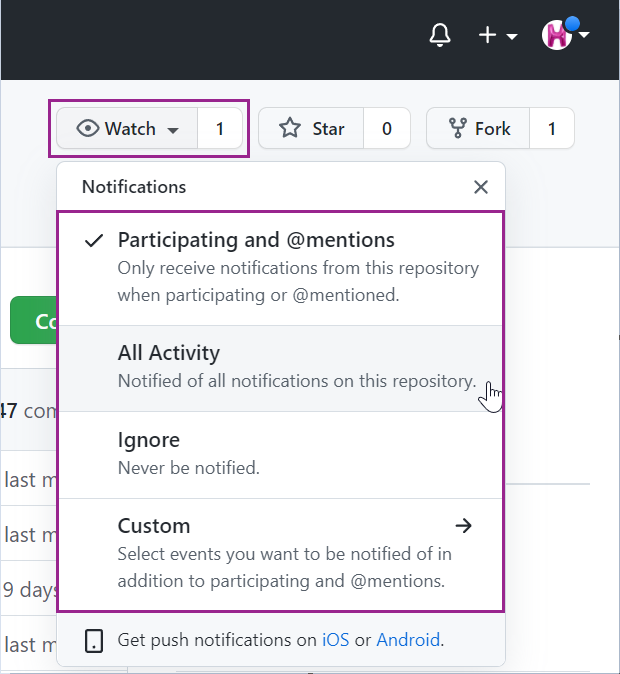
Hot Tip #2: Easily Switch Repository Branches Within VSCode.

Now that you have connected Visual Studio Code with GitHub, let’s review how to easily switch repository branches. You can do this by selecting your current branch name in the bottom left corner of the VSCode window. In the search bar that appears at the top of the screen, choose the branch you want to check out, or create a new branch. You can create a new branch by selecting the “+Create new branch…” option followed by entering a new branch name and hitting “Enter”.

Now you can easily switch between branches or create a new branch without leaving your IDE. Talk about efficient.

Hot Tip #3: See All the Code Changes on the Local Repository

The next VSCode tip and trick is an easy short cut to see all the changes you have made on your local repo that have not yet been pushed to your remote repo. To do so, hit Ctrl + Shift + G and you will see a list of files with changes made on your local repository within the Source Control panel. Select any file listed in the Source Control section to compare the changes on your local repo and the latest version on GitHub.

This makes it very easy to see what changes you are planning to push, as well as to quickly make some rollbacks.

Hot Tip #4: Push Changes from VSCode to GitHub

Now that we can quickly see where changes are, it’s time to review how to push these changes to GitHub. To push changes from VSCode to GitHub, there are three steps you will need to take:

First, stage your changes. To stage your changes, select Ctrl + Shift + G to open the Source Control panel, then select the + button next to each file you would like pushed to GitHub.

Next, commit your changes. To do this, locate the message bar at the top of the Source Control panel and add a commit message that describes the changes you are pushing such as “Added header”. Once your message is created, hit the check mark button next to the message box.

Finally, it’s time to push your changes. Select the “Sync Changes” button located below the message box.

There you have it! As easy as one, two, three. Your changes have now been pushed to your version control repository.

Conclusion

If you are one of the 14 million developers using VSCode (or someone who is looking to start using it) we hope these tips and tricks helped! You will now be able to easily integrate your source control software into your IDE for quick, easy and continuous development and version control.

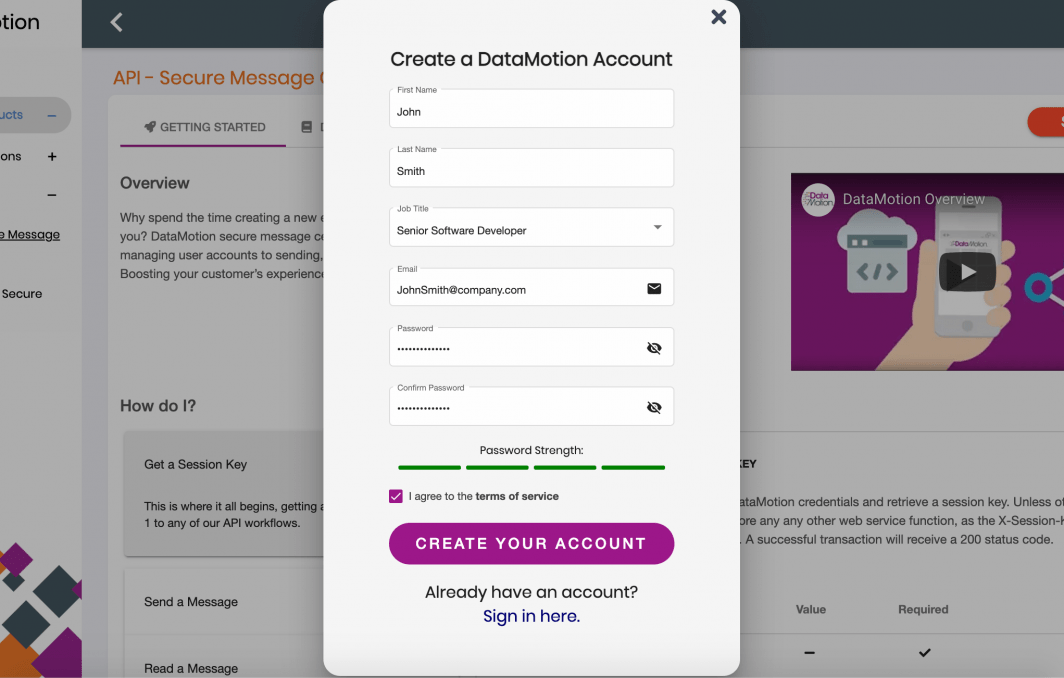
In the meantime, stop by DataMotion’s GitHub profile to find our projects and development resources. You can also put these new VSCode tips and tricks to the test today by signing up for a free trial of our secure message center API. If you have any questions, feel free to visit our documentation site or contact our sales team.

happy group of business colleagues working together on code development in cafe
GitHub Enrichment: 4 Tips for Efficiency and Security 736 312 Team DataMotion

GitHub Enrichment: 4 Tips for Efficiency and Security

The GitHub platform is used by over 52,000 companies worldwide, including Team DataMotion. Why, you might ask? Because GitHub’s source code management and version control functionalities make it super-easy to add and contribute to your projects. For developers working in a group and sharing responsibilities, it’s essential to push code changes quickly and efficiently. As we know all too well, delays can have a ripple effect as others on the project may need your work to be completed before moving forward.

By enhancing your version control knowledge, you can quickly add new features and bug fixes to a project and avoid these slowdowns. In addition to efficiency, by building your GitHub knowledge you can take the incentive to ensure there are other controls in place on your repositories, such as security policies and safety nets. With cybercrime and insider threats on the rise, DataMotion and many other large corporations consider these security features to be essential for any GitHub repository.

Four More Tips to Improve Your GitHub Experience

To help you build this knowledge, the development team here at DataMotion has put together a list of tips and tricks to help you utilize GitHub to its fullest potential. If you are just joining in, this blog post is the second in a two-part series summarizing the tips we’ve shared over social media. You can find a quick GitHub overview, as well as the first of the series of tips and tricks, in our first blog post.

These tips are intended to enhance an already-basic knowledge of the GitHub platform, but for those of you who are still pretty new to GitHub and would like more information on how to get started, we recommend you visit their quick start guide. Otherwise, let’s continue and review four new GitHub tips that will help secure your repositories, increase efficiency, and enhance collaboration.

GitHub Tip #5 – Limit Repo Access

The fifth tip in our series is to limit who has access to your repositories. Limiting who has access is an important security strategy known as a Least Privilege Model (LPM) implementation. In essence, you are allowing only those who need access to the repository to have that access and therefore are cutting down the possibility of an insider threat.

The first step is to ensure the visibility of the repository is set to private, rather than the public setting that grants everyone access by default. To do this, navigate to the repository you would like locked down. Once on the repository, select “Settings” then scroll to the bottom of the screen where you will find a “Danger Zone” section. In this section, select “Change Visibility” and choose the “Make Private” option.

Once your repository is private, you will be the only user with access. From here, you will want to assess who on your team should also have it, then make them a contributor. You can do this by scrolling to the top of “Settings” and choose “Manage Access” on the left-hand side menu. A new page will display; in the page select the green “Add People” button within the manage access section.

To limit who has access to and to secure your repositories, go to your GitHub profile settings. Then manage access. Then click the "Add People" button

From here, you can search for the persons you would like to have access and contribute to your project.

Now only those who need access to your project will have it, reducing the chance of an insider threat.

GitHub Tip #6 – Scan Your Code

Continuing with security and efficiency in mind, our next tip is to scan your code once it is added to your GitHub repository. You can utilize CodeQL (or another third-party tool from the marketplace) to set up code scanning. This means CodeQL or another third-party scanning software program will crawl your code and identify errors or possible vulnerabilities within your code once it is pushed to GitHub. Note: CodeQL does have compatibility with VSCode as well.

When using CodeQL, these vulnerabilities and errors are found using queries. You can utilize queries created by GitHub and community contributors or create your own to use during these scans. Scans may identify errors in data flow, structure, and syntax. Custom queries can be used to search for errors unique to your organization, such as a query that may search for instances of a deprecated company URL. Searching for these vulnerabilities will keep your code clean and help thwart attacks in the future.

GitHub Tip #7 – Scan for Secrets

In addition to scanning for vulnerabilities, you can tighten security by scanning for secrets as well. To configure this setting within GitHub, navigate to your repository and select “Settings” followed by “Security and analysis”. Then, next to “Secret scanning” click “Enable”.

Doing so will ensure that no sensitive tokens or private keys that may grant permissions are pushed to your current repository. Therefore, you can ensure that sensitive data, as well as permissions, stay locked down.

Quick Note: This feature is automatically enabled for all public repositories (thankfully!). For private repos, you will need an advanced security license to enable this feature.

GitHub Tip #8 – Compare Repo Versions

While developing and continuously pushing project changes, you may find that you need to look at changes on a specific branch of your repository and compare it to the main branch. Therefore, our last GitHub tip in the series is how to efficiently do this from the version control platform.

To compare repository changes with another branch, add “/compare/branch1..branch2” to your repo path. For example, you can navigate to github.com/HeatherPost/GitHubTesting to see our latest repository. Then navigate to github.com/HeatherPost/GitHubTesting/compare/main..TestBranch to see the changes made on our test branch.

There is also the ability to compare two commits as well. To do this, use two dots to separate the version numbers. For example to compare commitA and commitB you would navigate to github.com/HeatherPost/GitHubTesting/compare/commitA..commitB.

Final Thoughts

Congratulations! You are on your way to becoming a GitHub master. With these tips and your new skills, you can now add security and efficiency features to your GitHub repositories and code. As a final tip, we recommend trying each of these suggestions out on a test repository before implementing in your current and future projects.  Once you’ve had a chance to test drive these tips for yourself, you will be ready to go!

We’ll be back soon with the next series of tips and tricks, which are all geared toward enhancing and broadening your skillset. These will be posted on DataMotion’s Twitter, Facebook, and LinkedIn pages every Tuesday. As always, we will be sure to summarize each set of tips in an easy and convenient blog post. Keep an eye out!

You can find DataMotion’s open-source projects, Postman collections and libraries on our GitHub. To find out more on how our secure message APIs can help you, visit datamotion.com today!

Developer working on laptop and monitor pointing at the monitor using a pen
Get Resourceful with GitHub: Four Tips for the Skilled Developer 736 312 Team DataMotion

Get Resourceful with GitHub: Four Tips for the Skilled Developer

Have you ever been asked to share your GitHub profile at a job interview, or when meeting other developers at a conference? Doing so is an easy way to share your work and experience with others. With GitHub’s growing popularity, it’s now just as common for employers to request a GitHub profile as they would a LinkedIn profile. However, as great as the code hosting tool is for showboating talents, it does so much more. 

GitHub’s primary functions provide version control using Git and Internet hosting for web applications. As the platform continues to grow, new features are developed to enhance the primary functions and the development process as a whole. Understanding the magnitude of GitHub’s benefits, and how to use it to its fullest ability, will help advance your team’s productivity (as well as your career path).

Four Tips to Improve Your GitHub Experience

Over the past few weeks, our dev team has provided GitHub tips and tricks on DataMotion’s Twitter, Facebook and LinkedIn accounts to help users better utilize this version control tool. Below are the four tips we have provided to date, aggregated into a blog post for easy, convenient review.  

We created these tips to enhance an already-basic knowledge of the GitHub platform, but for those of you who are still pretty new to GitHub and would like more information on how to get started, visit their quick start guide.

GitHub Tip #1

Just as developers can showcase their software projects on GitHub, the GitHub Gist feature allows developers to easily display snippets of code as well. The gists are hosted on GitHub as any other repository would be and can be found on one’s GitHub profile. 

Gists can be used to share data and snippets of code through a URL or embed them into your webpages as I have below. By adding a quick source tag to our HTML, I was able to embed an example gist I created to this blog. 

This feature allowed me to easily provide the formatted code needed to get a DataMotion session key now without having to link to a full GitHub repo. Gists can be extremely useful when building documentation pages, how-to guides and, of course, technical blogs.

GitHub Tip #2

When collaborating on a project, you may want to fork a repository and push your changes to the main repo when you’re ready to contribute. This is a helpful strategy, but requires continuous pulling of the changes your partners push to the main project to ensure you are working with the latest code. Thankfully, GitHub makes it easy to know when you need to fetch these changes. 

Once your project is forked, make sure to enable the “Watch” feature on the main repository. By doing so, GitHub will notify you when a fetch is required. To do so, navigate to the main repository, select the watch button in the top right corner of the page, and choose your desired option!

To enable the "watch" feature on the main repository, click "watch" in the top right corner of the page and choose either "participating and @mentions," "all activity," "ignore," or "custom."

GitHub Tip #3

When collaborating on a development project, you can keep track of tasks by assigning bugs and feature requests with GitHub’s “Issues.” This feature allows users to create issues, which outline the different tasks that must be accomplished in order to complete a project. Developers can link to the issue in their push and pull requests in order to keep track of the issue’s progress. 

This adds issue tracking functionality on top of version control which helps further organize the development process. To get started, navigate to your project’s repository, select “Issues” at the top of the page followed by the “New Issue” button. From here, you can start filling out the details.

To create an "issue" select "issues" at the top of the page, then "new issue," then fill out the details when prompted

GitHub Tip #4

Now that we understand how the ‘Issues’ feature works, I’ll expand upon it. Developers may have a list of smaller tasks that need to be completed for one larger feature to be accomplished. To keep track of progress on a group of issues, utilize GitHub’s Milestones. 

The Milestones feature allows you to prioritize tasks and monitor which issues are completed and which are still open. You can also add a due date to each milestone to help better plan releases and keep to a specified development timeline. 

You can find more information on milestones within GitHub’s documentation. 

Key Takeaways

GitHub is an excellent tool for showcasing hosted code, but you can now see just how much more it has to offer. With the four tips reviewed today, you can enhance your development process and streamline collaboration by: 

  • Utilizing GitHub gists to share and display snippets of code
  • Ensuring you are notified when you must fetch upstream from a forked project 
  • Keeping track of bugs and feature requests with GitHub’s Issues
  • Using Milestones in order to group and prioritize various Issues

In the coming several weeks, every Tuesday, we will provide additional GitHub tips on DataMotion’s Twitter, Facebook and LinkedIn accounts. In the meantime, be sure to check out DataMotion’s GitHub profile to find our projects and development resources. To learn more about DataMotion and our products, visit our documentation site or contact our team of experts. 

Developer staring at a monitor with two windows of code open side by side
8 Tips for Postman API Testing Success 736 313 Team DataMotion

8 Tips for Postman API Testing Success

In software development, application programming interfaces (APIs) are an absolute necessity. APIs play a crucial role in enabling various systems to communicate and share data with one another. These versatile tools make it possible for developers to incorporate ready-made code into their applications, saving them the time and effort of creating complex features from scratch. Just as peanut butter pairs perfectly with chocolate, and a baseball game isn’t complete without sunshine, APIs are an integral part of a developer’s toolkit.

When it comes to working with APIs, there’s one tool that stands out above the rest: Postman. Loved by over 15 million developers and half a million companies worldwide, Postman has emerged as a key tool for programmers who need to test APIs, streamline their workflows, and save time.

What is Postman?

Postman is more than just an API testing application. It’s an all-in-one platform that supports every stage of the API lifecycle, from design and development to testing, documentation, and monitoring. With its user-friendly interface and extensive API collections, Postman has simplified the often-complex task of working with APIs.

Imagine you’re experimenting with a new API. You would likely need to set up the necessary request details, create an account, and provide account credentials before making the API call. With Postman’s API collections, all these details are readily available, cutting down your setup time and letting you ‘plug and play’ with ease.

As a testament to its effectiveness, the development team at DataMotion frequently utilizes Postman in their work, appreciating the many ways this tool enhances their productivity and efficiency.

Postman Tips and Tricks for Better API Testing

Postman is more than just an API testing application. It’s an all-in-one platform that supports every stage of the API lifecycle, from design and development to testing, documentation, and monitoring. With its user-friendly interface and extensive API collections, Postman has simplified the often-complex task of working with APIs.

After extensive use of Postman and thorough research, the development team at DataMotion has pulled together numerous tips and tricks to make the most of this powerful tool. These tips will save you time, streamline your API testing process, and help you become a Postman guru.

Tip 1: Streamline Workflows with Bulk Editing

Manually updating headers and parameters for each request can be time-consuming and repetitive. The ‘Bulk Edit’ feature in Postman is a lifesaver here. You can access this feature in the Header and Params sections, allowing you to see the list of headers or params in text rather than in a table format. This then allows you to copy the text and paste it into your new request. In the same section of your new request, select ‘Bulk Edit’ again and paste the text within. From here you can select ‘Key Values’ which has replaced the bulk edit option to see all your headers or params in the table format. This way, you can swiftly update your requests without having to modify each one individually.

Postman Tip 1, use bulk edit to copy and paste params or headers

Tip 2: Use Variables for Repeated Data in Multiple Requests

Another handy feature in Postman is its support for variables. You can set up variables within a folder or collection for data that is used repeatedly across multiple requests. For example, in DataMotion’s API collections, we have a header for a session key in most of our requests. When the session key updates, you can instead create a variable and update the session key variable’s value. You can then use {{variable}} to reference the variable in your requests. This simplifies updating the session key; you just update the variable value once, and it applies to all references across your requests.

Tip 3: Bulk Test Multiple Requests by Adding a Test Script

As a developer, quality assurance (QA) testing is an inevitable part of your role. Postman has a convenient way of allowing you to test multiple requests at once with the same script. To do this, select the folder or collection containing the requests you want to test, then navigate to the ‘Test’ tab and add your test code. You can then run the entire collection, executing multiple tests at the same time.

Postman Tip 3, test requests in bulk by clicking collection then adding a test script in the test tab

Tip 4: Enabling and Disabling Headers or Parameters

There might be times when you want to run a request without certain headers or parameters. Rather than deleting them and then having to add them back in later, Postman lets you disable or enable headers or parameters with a simple click. Deselect the checkbox next to each header or parameter you want to disable. This allows you to run the request with only the enabled headers or parameters included.

Postman Tip 4, run a request without a header or parameter by deselecting the checkbox next to each

Tip 5: Use the Postman Console to Update Environment Variables from a JSON Response

A great tip I recently learned utilizes the Postman console to update environment variables using data from a JSON response. You can write a script that parses the JSON response returned after making a request, then update an environment variable with this response data – all within Postman.

This trick is particularly useful when getting session keys. Within the DataMotion Postman collection, several requests require a session key. To streamline the testing process, I created a ‘SessionKey’ variable that allows me to easily update each instance at once. Then I add the following code to my console, which captures the updated session key from DataMotion’s ‘Get Sessionkey’ API call and automatically populates the ‘SessionKey’ variable with the response.

var data = JSON.parse(responseBody);

postman.setEnvironmentVariable(“SessionKey”, data.SessionKey);

This ensures that the ‘SessionKey’ variable in the majority of my requests consistently reflects the most current session key retrieved through the ‘GetSessionkey’ API call.

Tip 6: Utilize Postman’s Find and Replace Feature

The session key variable is scattered across the DataMotion collection. If the variable name needed to changed or be updated, it would be a long and menial task to complete. However, this work can be replaced with Postman’s find and replace feature.

To rename a variable, such as the session key variable or an attribute name, navigate to the bottom right of your Postman workspace to find the “Find and Replace” button. Select this button and type in the phrase or regex pattern you would like to identify. From here, select specific instances of this phrase to update or select all. Then enter the new phrase you would like to replace these instances with under the “Replace With” section and click “Replace.”

Navigate to bottom right of Postman window and find the "Find and Replace" button

Tip 7: Convert Your API Requests into Code Snippets

Postman is not just an API testing tool; it’s also great for converting your API calls into code. After configuring your Postman request, simply select the code icon on the right panel of your workspace, select a programming language, and copy the generated code snippet of your request.

You can then seamlessly integrate this snippet into your projects for a streamlined development process.

Select code icon in right panel to get code snippet

Tip 8: Automatically Create Documentation for Your Collections

You can create API documentation for your Postman collections using the documentation icon in the right panel of the Postman workspace.

Once you have selected the documentation icon, you will see the documentation for your request, including details on the endpoint, parameters, headers and body values. You can also select the ‘View the complete documentation’ button at the bottom of this view to get documentation on your entire collection. From here, you can select publish in the top right corner to publish this information, directly from Postman.

Create API documentation for collections with documentation icon

Deep Dive into Secure Message Center API with Postman

While Postman is a powerful ally for any API-related work, its functionality is especially evident when used with the secure message center API. Developed by DataMotion, the secure message center API enables secure messaging, email, and document exchange integration into self-service portals like online banking, insurance member services, wealth management portals, and more.

These self-service portals have become the primary interfaces for customers to manage their accounts, conduct transactions, find healthcare specialists, or check insurance claim statuses. However, these portals occasionally fall short of providing secure and compliant communication channels. This is where the secure message center API, built with data privacy and governance regulations like GLBA and HIPAA in mind, comes into play. By integrating the secure message center API into these portals, businesses can quickly establish a robust, secure, and compliant communication resource.

Postman’s ability to test, validate, and demonstrate the functionalities of the secure message center API proves invaluable in these integrations, making it easier for developers to understand, work with, and leverage the API to its full potential.

Postman Demonstration Videos

To help you navigate the complexities of secure messaging and API testing, DataMotion has prepared a series of demo videos showcasing the use of Postman with the secure message center API. These videos serve as a step-by-step guide, walking you through the API’s functionality and demonstrating how Postman can be utilized to facilitate API testing. Not a fan of Postman, but are looking for something different to test APIs? Check out our recent blog post and video demonstration that leverages the Insomnia REST Client for API testing.

Sending Secure Messages with DataMotion via Postman

Here’s one of our software developers demonstrating our ‘send message’ API. If you’d like to follow along, you can view our Postman Collection on GitHub and try out our APIs in our self-service portal.

Managing Folders in DataMotion's Secure Message Center API with Postman

This video offers a comprehensive demonstration of folder management with the secure message center API. It covers the essential steps of listing, creating, and deleting folders for efficient organization.

If you are developing a self-service portal for a financial services or insurance company – we hope this taste of secure message center programmability clarifies what you can build with our APIs. Of course, there is a lot more functionality – and all of the secure message center APIs are well documented with sample code and SDKs.

Conclusion and Invitation for Further Exploration

APIs have revolutionized the way developers work, and Postman is one of our favorite tools leading the charge in making API testing more accessible, efficient, and effective. As we continue to explore and discover new facets of this and other powerful tools, we’ll continue to share our knowledge and tips with the developer community. For more insights into the world of Postman, similar tools like Insomnia, and API testing in general, follow us on LinkedIn, Facebook, and Twitter and subscribe to our monthly newsletter. We post new tips and tricks every Tuesday, providing fresh content to help you master these incredible tools. To put your Postman learning into practice, download our Postman collections on GitHub.

Feel free to contact us for any questions or to discuss your project ideas, and don’t hesitate to book time for a conversation or technology demonstration!

Updated November 9, 2023

Programmer working on developing software with two laptops, a monitor, a keyboard, and a track pad
5 Things to Consider Before Developing Software In-house 736 313 Team DataMotion

5 Things to Consider Before Developing Software In-house

It’s a common analogy: the decision between building or buying a software application is comparable to choosing whether to build or buy a house. The pros and cons for both are similar. Building it yourself often leads to something made specifically for your needs and could save you money. However, it also can take much longer than predicted and has a substantial risk of unexpected expenses. While choosing to buy can be the simpler and faster decision, you may not receive that “made just for you” feeling you were hoping for. Many of our customers struggled with this dilemma before choosing to use a third-party vendor. Why is this? We’ll highlight five things to consider before developing software in-house and why it may be better to let someone else do the heavy lifting.

Stressed out developer taking a break while resting hands on headBefore getting started, we want to emphasize that building software in-house is not always a bad decision. If your desired solution is expected to be core to your business and your team has the resources to build it themselves, then building it in-house can be the better option. Not only will your solution have the features you need, but you’ll also have greater control over it in the long run. On the contrary, if your solution is not expected to handle core business processes and your team has other critical priorities, we encourage you to keep reading.

Now that we’ve gotten that out of the way, let’s get started. Here are five things to consider before building software in-house.

Five Things to Consider Before Developing Software In-House:

1. It’s a massive time commitment. As we alluded to earlier, building a new software solution or application from scratch can be an extremely long, drawn-out process. In fact, the time it takes to develop the front and back-end infrastructure for a standard web application is 4.5 months. If your project includes complex features, such as secure messaging, assume it will take longer. And when you think you’re done, you’re not. Work isn’t complete once you go live. As the software developer, you will be responsible for monitoring, updating, and supporting your application even after it’s launched.

2. It’s incredibly expensive. When you build software in-house, it’s common to assume that you’re saving money. While that may be true, it’s not always the case. To put the costs into perspective, let’s crunch some numbers.

For simplicity, we’re assuming we have a one-person team, a front-end developer. We’re also assuming they’ll complete the project in 4.5 months while working 40 hours per week.

Estimate for how many hours it will take to build software in house. Taking 4.5 months and multiplying it by week per month and 40 hours per work week.

That works out to 720 hours for one employee to work on a single application. Odds are, you’ll have a team of developers working together, so make sure to multiply that number by the number of people on your team.

Since we’re talking in terms of money here, let’s convert that to how much you will spend during that time frame, using $57 as the average pay per hour for a front-end developer in the United States.

Estimate for cost to build software in house. Taking the average pay per hour for a front-end developer multiplied by the number of hours to develop a standard web application. Estimated cost comes out to $41,040

$41,040. That’s the minimum you’ll spend to build a standard web application. Now, we’ll admit that math was not perfect. You’ll likely have a larger team, consisting of employees in various roles, all getting paid different amounts.

Not to mention – all that time and money that went towards building your application could have been spent focusing on other priorities, so there’s an opportunity cost to consider.

3. It’s (probably) already been built. Unless your requirements are highly specific and unique, there’s an excellent chance someone has already built all, or at least part of, what you’re searching for. A third-party vendor has already put an extensive amount of time and work into testing and perfecting their solution to ensure it works exactly as expected. Thus, they will know the ins and outs of their product, how it was built, what it can and cannot integrate with, the potential to customize it, and solutions to common problems. In short, these folks have years of experience and know what they’re doing.

Word of warning: not every third-party vendor is built equal. While many have taken the necessary steps to protect their system’s security and meet the needs of their customers, it’s important to do your due diligence when choosing to outsource all, or parts of, your project. Here are 14 points to consider when vetting a third-party vendor, particularly when choosing an API company.

4. You will be your own support team. As mentioned earlier, building software in-house means providing support for your software throughout its lifespan. This requires a significant, ongoing time commitment from your team. It also involves a constant effort to maintain the skills and knowledge to properly respond to requests. This means continuous training for your current team, and any future team members.

5. Other products have been polished and perfected. Remember when we mentioned earlier that an application with your requirements has likely already been built? This is a critical topic, so we’re going to reference that again in this last point. Many API and SaaS companies have been around for a while and have already spent years testing, modifying, and updating their services. Often, this results in a fine-tuned product specifically designed to meet customer demands.

This experience factor is also important to consider if your desired solution must comply with industry and privacy regulations. To satisfy compliance requirements, specific steps must be taken, and certain criteria met both within the services offered and the organization who provides the service. Many third-party vendors have already taken the extensive time needed to fulfill these requirements so their customers can focus their resources elsewhere.

To Sum Up

Building software in-house may sound like a promising idea when you’re considering a project. However, it is critical to assess the pros and cons of building it yourself, lest you fall into a never-ending development cycle. And if your project involves any type of secure messaging system, additional time must be taken to meet regulatory compliance requirements.

To close out this blog post, we’d like to provide you with five preliminary questions to ask yourself when choosing to build or buy software:

  1. Is my desired solution core to my business processes?
  2. How much time and money should I devote to my project?
  3. Do integrations for any of my solution’s preferred features exist?
  4. Do I have the resources to update, maintain, and provide support for my solution throughout its lifespan?
  5. If my solution deals with any kind of sensitive information, what are the relevant regulations with which it must comply?

DataMotion offers a variety of API and pre-built solutions for organizations seeking to add an easy-to-use and secure messaging system to their communications toolkit. We also offer several pricing plans for our pre-built services and tiered pricing for our transactional APIs. To get an estimate on how much you’ll spend using our secure message delivery API, you can use the calculator on our pricing page.

Explore More

Sources and Related Reads

Blue pixelated checkmark on a dark blue pixelated background
Choosing an API Company: 14 Points for Due Diligence 736 310 Alex Mushkin

Choosing an API Company: 14 Points for Due Diligence

Technical depth. Benefits. Security. These are a few things that you will have on a checklist when choosing an API company. As we mentioned in part three of the Danger for Data series, taking time for due diligence is essential for your systems security as well as your overall business needs. In this blog post, we’re picking up on the recommendations we made previously and sharing a few questions and points of consideration for your diligence discussions. Consider this a pocket guide to refer back to when evaluating a potential API vendor. We’ve also linked to a few helpful resources for additional points of reference.

Specific Questions to Ask

Below, you will find a list of recommended questions to ask when choosing a potential API company, and a little context as to why these are important points.

  1. Is the API documentation available publicly, and does it cover methods and error codes? Documentation makes it easy to integrate your workflows with the API. Essentially, this is the blueprint detailing how to use the vendor’s API. The documentation should include information such as BaseURLs, HTTP methods, header values, request body parameters, error codes and more. DataMotion offers a comprehensive knowledge base and ample documentation for all of our services. Our knowledge base covers all bases, giving devs the information that they need at their fingertips. Here is an example of what you should expect from your vendor.
  2. Does the company offer a pre-production sandbox environment, or other means to try the API before purchasing? You will want an opportunity to test the API before you buy. Having this option, or some other pre-production sandbox, will give you an idea of ease of use, and how to best integrate into your existing workflow without disrupting day-to-day operations.
  3. What kind of purchase plans are available, and is billing a flat rate, or related to use? Your usage needs are likely going to fluctuate, perhaps on a daily, weekly, or monthly basis. Companies will offer a variety of pricing models for you to choose from, but you should ask about tiers, and what the company offers if you do not use all of the API calls in a package. Ask what happens if they have a flat rate, and you go over the ceiling. Are there additional fees, or will these retain the same rate?
  4. What kind of rate limits does the company have? Having the right limit helps ensure that your API continues to provide a consistent experience, even as usage increases. In addition, rate limits can protect your systems against DoS attacks and improve your application’s end-user experience.
  5. What kind of consulting and support do they provide? As your organization evolves, your needs will as well, and your vendor should be prepared to consult on new solutions, or adjust to meet your changing needs. Additionally, an evolving business means evolving support requirements. Ask not only about their overall support availability, but if support scales based upon your package.
  6. What is their escalation process like? If there is an emergency in the wee hours, you will want to know exactly who is responsible for what, how you can reach support, and how long it will take for updates and fixes. This question, in addition to Question 5, should be part of a comprehensive discussion about support, and what will be available to you.
  7. What kind of monitoring and reporting is offered? You will want to know in real time how your API is functioning and if there are any service interruptions or other operational issues. You will also want to have reports on your users’ activity for audit tracking purposes. DataMotion recognizes the critical nature of this area and offers 24/7 activity monitoring of the DataMotion API platform, whether deployed as a public PaaS or on our customers’ private instances managed by DataMotion. A wide range of built-in reports that cover key aspects of system functionality and users’ activity are also available.
  8. Does the company offer an API that uses OAuth or SAML authentication for Single Sign On (SSO)? To keep your systems secure, it’s important to select an API that follows the proper security precautions. Choosing an API company who uses an identity provider such as OAuth or SAML allows you to verify who is making an API call without revealing their credentials.
  9. Is there an SDK? The SDK is a getting-started point when integrating the API into your workflow, so if this, or any helper libraries are offered, you will want to ensure that that they align with your programming language.
  10. What kind of internal security model does the provider use? You should approach this exercise with a security-first mindset, and ask the provider about their security architecture. We recommend asking if the provider uses the zero-trust model, or any of its aspects. As part of this, ask about separation of duties, who can see what, who has access to the servers, and who is able to physically access any data centers.

Additional Points of Consideration

  1. Encryption for Data in Motion: As we’ve discussed in previous blog posts, a data breach is a matter of when, not if. Encrypting your data while in motion acts as an insurance policy. If your system is compromised, encryption makes your data and documents unreadable, and therefore useless to would-be thieves. If your solution will be exchanging any type of sensitive data, you need to choose an API that encrypts the information exchanged from one endpoint to another.
  2. Breadth and Depth: The greater the depth and breadth of an API, the more control you have over various aspects of how it interacts with your app. You will want to look for multiple types of APIs that operate at varying levels. DataMotion offers exactly this, including secure messaging, administrative, and provisioning APIs. You can read more about this in the blog “3 Things to Look for When Selecting Email Encryption APIs”.
  3. Verifiable Compliance Certifications: Any reputable API company should operate with security and compliance top-of-mind. A good indicator of this is their verifiable compliance certifications. Ask what kind of certifications the company has and where this documentation is available. By visiting our homepage, you can learn more about DataMotion’s certifications including:
      • DirectTrust/EHNAC RA, CA, HISP 
      • ONC-HIT 2015 Edition Health IT Modular Certification 
      • Using SOC 2- and FedRAMP-certified cloud service provider to deploy DataMotion PaaS
  4. Internal Security: To reiterate Question 10, the importance of internal security cannot be stressed enough. Ask about the company’s internal methods to keep your enterprise’s data safe when in motion. For instance, do they follow a zero-trust strategy or a similar type of security model? Get specific and granular – the vendor should be candid about their security practices.

We hope that you found these recommendations helpful. We invite you to tour DataMotion services and explore the self-service portal to learn about and trial our APIs. If you have any questions, we are happy to assist – please feel free to contact us.

Image of API code on a blue screen
Enabling Secure, Automated Email Notifications with the Secure Message Delivery API 786 310 Christian Grunkemeyer

Enabling Secure, Automated Email Notifications with the Secure Message Delivery API

Recently, we released the DataMotion API for secure message delivery. Like the rest of our family of APIs, it’s just as easy to code into your apps, portals, and workflows as it is to bake a cake. But what makes it unique is that it’s a small subset of our larger collection of secure message center APIs. So, instead of getting APIs for secure messaging, administration, and provisioning, you’ll only be buying an API for sending secure messages. Think of it like a computer monitor, keyboard, and mouse bundle. If you only need the monitor, there’s no sense in paying more for the mouse and keyboard, so you’ll just buy the monitor by itself.

So, if the secure message delivery API is only a subset of our secure message center APIs, what exactly does it do? Well, as you would expect, it integrates the ability to send a secure message in one direction into whatever you build. Also, it supports granular tracking and reporting at the per recipient, per attachment level. With this API alone, you probably won’t be building out an entire ecosystem for secure exchange, but you might enable automated, secure email notifications or a one-way, user-initiated secure channel for sending sensitive documents in your app or portal, for example.

Sample Scenario

To paint a better picture of what you can build with this API, we’re going to highlight a brief, sample use case. Let’s imagine you’re a front-end developer for a wealth management firm tasked with creating a secure and automatic system for notifying clients whenever there is a change in their account allocation. You already have a system in place that tracks every action taken on a client’s account and records the exact time that each action occurred. Now, you just need to create a workflow that automatically sends an email notification whenever a major change in an account takes place, such as an account allocation change. You don’t want clients to be able to reply directly to this notification, they just need to be able to view the description of the change that was made, view the steps needed to resolve changes that they don’t recognize, and you need to be able to view who has received and opened each message and when they opened it. Because the workflows needed to send these notifications are linked to private account information, you recognize that it’s better if they are sent in a secure manner to protect your client’s data.

This is where the secure message delivery API comes into play. With a few lines of code, it helps you quickly inject the functionality for sending secure email alerts right into your workflow, so you don’t have to build it yourself. With this API, your organization can easily send secure, automated account notifications and track the status of every message sent for operational and compliance reporting. Essentially, you’ll achieve a win-win-win scenario. You’ll streamline your business processes, your developers will save valuable development time, and your client’s will receive a simpler and more secure user experience.

What's Next?

So, now that you have a better idea of what you can build with the secure message delivery API, it’s time for you to get started and try it out for yourself. You can view documentation for this API or start building right now by signing up for a free trial right in our self-service portal.

Light blue circles on a dark blue background with strings of data
Getting Started with the DataMotion Secure Message Center API – Session Keys and Sending a Secure Message 788 311 Jose DeLavalle

Getting Started with the DataMotion Secure Message Center API – Session Keys and Sending a Secure Message

4 Minute Read

In this blog series, you’ll learn how to use the DataMotion secure message center APIs. We’ll start with the basics of getting a session key and sending a message, then explore a wide range of additional functionality. To make this series quick and easy to follow, we’ve broken it up into a few, easy-to-consume parts. This first part should only take you a few minutes, so you can start brewing a pot of coffee and celebrate with a fresh cup when your code is done.

For those who aren’t familiar with this family of DataMotion APIs, they make implementing modern secure document and message exchange in your mobile apps, portals, and workflows easy and fast. It’s a win-win – you get the secure features you need while having extra time to focus on other features that make your app best-of-its-kind.

There are many use cases where our secure messaging APIs have saved the day, ranging from enabling client to advisor exchanges in wealth management apps, to the exchange of medical results for clinical trials. Now, customers can say goodbye to muzak on hold, stamps, faxes or trips to see their advisor. Instead, they’ll be saying hello to securely getting business done in record time.

Now that you have a better understanding of what these APIs can do, let’s begin with the first part of this tutorial. We’ll start with showing you how to get a session key and send your first secure message directly from the “How Do I?” module in our self-service center.

First Things First...

There are a couple of things you will need to confirm prior to diving into this tutorial. First, in order to get a session key and send your first message, you must be signed up for a DataMotion developer account. If you don’t have one yet, you can fill out the form that pops up to “Create a DataMotion Account” when clicking the “Login” button at the top right corner of the self-service center. Upon completion of this form, you’ll begin a free 120-day trial of our secure message center APIs and you’ll be ready to move on to the rest of this tutorial. So, let’s get started!

Create a DataMotion account free trial sign up form

Get a Session Key

Before calling any of the functions in this suite of APIs, you’ll need to get a session key. A session key verifies a user’s account credentials, so the system knows it’s actually them when making API calls. To get a session key, your users will enter their UserIDorEmail and Password. In this example, use the ones that you established when creating your developer account and enter them into the body of your HTTPS request. Then click the Submit button.

How to get a session key for the secure message center API using your UserIDorEmail and Password

A successful response will return a 200 Status Code with a Response BODY:

Sample of a successful session key response body. Including a 200 OK status code and your session key

To keep things secure (that’s what we do), this session key will expire after 30 minutes of inactivity on an account.

It’s important to take a quick step back to discuss this process of getting a session key in a little more detail. For the purposes of this tutorial, we asked you to simply input your UserIDorEmail and Password. However, this isn’t the only method to verify your identity with our services. We also support single sign on and integrations with public or private identity providers, such as SAML, to establish and verify a user’s identity.

Send a Message

Now that you have a session key, keep it handy. We will be adding it as a custom header value to every other DataMotion secure message center API call we make. Alright, so let’s send your first message.

Using the same “How Do I?” module, you’re going to move down to the tab labeled “Send a Message.” First, to make things easy, you’ll notice that the “To” and “From” fields are already filled out for you using the email address associated with your DataMotion account. All you’ll need to do is fill out the Subject and the TextBody, then click Submit to send your message.

Sending a message with the secure messaging API with test subject and test text body

If your secure message sends successfully, you will receive a 200 status code along with your message ID and the message expiration date. Because the “To” field was pre-populated with your email address, you will receive a message waiting notification in your inbox. A successful request will look similar to the following:

Sample response for a successfully sent message with 200 OK status code, MessageID, and message ExpirationDate

What's Next?

Take a bow!  You’ve successfully gained access to the API, established a Session Key and sent a message. It’s a great time to treat yourself to that fresh cup of coffee!

You’re now ready to move on to the next step. In the next part of this blog series, we’ll show you how get your message summaries and how to read a message.

In the meantime, you can read up on our Get a Session Key and Send a Message documentation for the secure message center APIs in our developer center.

If you haven’t already, try it out for yourself using our “How do I?” module in our self-service center!

Try it Out
An image of a blue smartphone with cloud, data, and analytics icons coming out of it
SaaS vs. PaaS: How to Choose What Type of Secure Exchange Solution Is Right for You 788 309 Christian Grunkemeyer

SaaS vs. PaaS: How to Choose What Type of Secure Exchange Solution Is Right for You

When searching for a secure exchange solution, finding a platform that safeguards sensitive information is crucial. Imagine you’re searching for a secure document, messaging or email solution, and two contenders emerge — software as a service (SaaS) and platform as a service (PaaS). It’s a big decision, but with the right platform, you can feel confident that your information is protected.

In a world where information flows ceaselessly, choosing the right secure data exchange platform is extremely important. The two major choices — SaaS and PaaS — come with their unique advantages in terms of scalability, interoperability and faster time-to-market.

In this blog, we’ll guide you through the process of how to decide which of these data exchange platforms is right for you, starting with an overview of SaaS vs. PaaS, whom each option is best suited for and the benefits of each. By the time you finish reading, you should have a better understanding of which direction you should be heading.

SaaS vs. PaaS

Before we begin, it’s essential to define an SaaS vs. a PaaS.

SaaS

SaaS refers to a cloud-based software distribution model where a third-party service provider manages the software applications.

In this model, users can access and utilize the software over the internet, eliminating the need for local installation and maintenance. With SaaS, organizations can leverage fully developed and pre-built software solutions without coding experience or the complexities of managing underlying infrastructure, platforms, operating systems or applications.

Under the SaaS model, users subscribe to the software, paying for the service monthly or annually. SaaS solutions cater to various applications, including email communication, document management, customer relationship management and more.

Traditionally, this is how most standard email encryption processes are offered. These pre-built solutions make it easy for any organization, large or small, to enable the secure exchange of things like messages and documents for their employees and customers.

PaaS

PaaS represents a cloud computing service model that furnishes an environment and platform on which you are responsible for installing necessary software and developing, deploying and maintaining your applications. By eliminating the complexities of infrastructure and platform management, it becomes easier to focus exclusively on application management and development. In this framework, your technology team can concentrate on managing and developing applications, while the service provider takes care of the hardware, operating system and other infrastructure components.

PaaS is ideal for situations where you require custom integrations with applications and greater control over the development and management of your applications. PaaS solutions typically involve the use of APIs and other connectors to integrate certain functionalities into an existing or new system.

The Benefits of a Pre-built, SaaS Solution for Secure Exchange

Now that you have a better understanding of what each type of solution is, it will be helpful to clearly lay out the benefits of each, starting with pre-built solutions for securely exchanging documents and messages. The benefits of a SaaS solution for secure exchange are substantial and are well-suited for any business, from small startups to enterprises. Here’s a breakdown of the key benefits:

  • Faster time-to-market: SaaS solutions come pre-built, eliminating the need for complex coding or development efforts. This means you can swiftly implement secure exchange functionalities without the resource-intensive process of building from scratch.
  • Swift implementation: Businesses can rapidly deploy SaaS solutions. This speed to market is invaluable for staying competitive. Additionally, utilizing a SaaS platform can enhance security measures, as the service provider is accountable for regularly implementing and thoroughly testing bug fixes, patches and enhancements.
  • Low resource commitment: SaaS solutions remove the need for an extensive development team or significant resources. This is particularly beneficial for organizations with limited to no technical expertise.
  • Managed updates and enhancements: With SaaS, updates, bug fixes and enhancements are managed by the service provider. This ensures your secure exchange platform remains current, robust and fortified against emerging threats.
  • User-friendly accessibility: Because SaaS solutions are accessed via the internet, they can easily be used on desktop or mobile devices, so you, your employees and even customers can securely send and receive documents from virtually anywhere.
  • Integration possibilities: Some pre-built offerings also give the option to integrate with existing or new systems. This includes features like Single Sign-On, toolbar plug-ins or seamless encryption added to your email client’s backend. Such integrations enhance the user experience and improve security.
  • Increased trust and efficiency: Overall, these pre-built solutions are great for those looking to accelerate their business processes and boost customer trust with more secure, trustworthy and easy-to-use methods of communication.
  • Flexible pricing models: Because these SaaS solutions typically follow a monthly or annual pricing model, both large and small businesses can enjoy the benefits of pre-built secure exchange while only paying for the features they need.
  • Zero capital costs: SaaS is a subscription-based service that requires no additional software installation or application development, resulting in zero capital costs. The subscription fees are considered operational expenses.
  • Highly scalable: SaaS is highly scalable. You can scale up or down based on the demand without the need for procuring additional infrastructure resources.

The Benefits of PaaS Solutions & API Integrations for Secure Exchange

So, you’ve learned a little bit about ready-to-use pre-built solutions. But what if you already have your own application or maybe you’re building out a self-service portal and want to add secure messaging functionality directly within it?

If you’re looking for a simple way to extend a secure experience in a truly native, natural and integrated way across your apps, portals and workflows, then the use of APIs and connectors might be better suited for you. This is where PaaS shines, tailored to meet your unique needs. Let’s dive into its benefits:

  • Native integration for enhanced security: PaaS solutions offer native integration, seamlessly embedding secure exchange functionalities into existing systems. This enhances PaaS security by ensuring secure exchange is an intrinsic part of your operations.
  • Tailored features with APIs: Rather than building out every feature yourself, you can take advantage of API integrations for some of the features that are not part of your business’s core competencies. This customization capability allows you to sculpt secure messaging, document exchange and more to match your organization’s unique requirements.
  • Efficiency and cost-effectiveness: PaaS is a haven for developers, vendors and system integrators. Utilizing APIs and connectors streamlines development and implementation, making the process more efficient and cost-effective. You can port your existing applications and solutions onto the PaaS platform and expand upon them without needing to worry about managing the infrastructure and operating system.
  • Adaptive: PaaS solutions and API integrations are adaptable to a variety of data exchange platforms, from secure messaging to document exchange. Their scalability ensures they can meet the evolving needs of your organization.
  • Robust platform and compliance assurance: You can be confident that your new secure messaging functionalities were built on a robust platform by developers and engineers who have taken the time to ensure that the APIs you use will meet the third-party certifications you need to comply with regulations that are industry-specific or hard to implement.

Choosing the Right Secure Exchange Solution for You

To be completely straightforward, it depends. Both data exchange platforms are solid choices but ultimately depend on your organization’s needs and resources. Let’s consider your choices:

  • Option 1: If you’re looking for a solution that requires minimal resources and maintenance on your end while still providing you with features that suit your organization’s needs, then a pre-built SaaS solution would probably be better suited for you.
  • Option 2: If you’re a developer, software engineer or system integrator and you want to add-in secure messaging functionalities to the app or portal that you’ve built, then using APIs and connectors would be ideal for you.

As you look to make this decision, it is important to consider both SaaS and PaaS intently, as either could be the right choice based on your organization’s specific requirements.

Experience Secure Communication with DataMotion

At DataMotion, we offer both of these options so you can choose the one that best fits your needs. Our pre-built bundles and API solutions were designed so you can have maximum security without compromising your experience. All of our options are scalable to your business needs, and we offer various integrations so you can add secure exchange in the systems you want in the way that’s best for you. Try them out for yourself by testing out one of our pre-built bundles or our secure message center APIs now.

With over two decades of experience, we’ve perfected the art of secure exchange. Contact us online and take the first step toward a secure digital future.

Updated November 1, 2023

3 Things to Look for When Selecting Email Encryption APIs 1024 310 Alex Mushkin

3 Things to Look for When Selecting Email Encryption APIs

If your business handles sensitive data, encrypted email software can help you manage security. With secure email technology, you can reduce the risk of data theft, accidental exposure and regulatory compliance audits. Email encryption application programming interfaces (APIs) are a great way to boost security.

APIs are a sophisticated addition to your security tools. They help elevate your encryption measures, making communications safer and security easier between your business and your customers. With the right secure email API, your organization can easily add new protective measures without reducing productivity. Let’s take a look at email encryption APIs and how to choose the right API for your needs.

Email API Security Explained

In our digital age, email communication is essential. Businesses often request their customers’ contact information and have a responsibility to keep their email addresses safe and secure. With an encrypted email API, you can create a more dynamic security strategy for your organization.

The Intersection of Email Communication and Encryption

Encryption is an excellent defense for email, protecting customer data as messages are sent out. Encrypting emails prevents anyone other than the intended recipient from reading the message. If an unintended party gains access to the email, it’ll remain concealed unless they have the private code to unjumble the message. While encryption is fairly secure on its own, combining it with APIs helps protect emails further.

API Development and Email Security

APIs play a crucial role in email security by enhancing encryption efforts. They allow encryption protocols to fit seamlessly into email systems, automate the process and ensure consistent security measures across communications. Secure API development in email encryption involves creating better protections against vulnerabilities. Implementing an API that improves email security allows you to enjoy a more streamlined encryption process while weaving security into the email infrastructure.

With APIs and email encryption working hand in hand, organizations can establish a dynamic defense against evolving cyber threats. APIs help make your encryption more adaptable, keeping your email communications secure.

Key Criteria to Consider When Choosing an Email Encryption API

The secure email API you choose depends on your security needs, email setup and support preferences. Getting an email encryption API that can meet all your needs while working with your existing technology is essential. Here are some factors you should look for when choosing your API.

1. API Depth and Breadth

Depth and breadth give you control over more aspects of how the API works with your app. Look for multiple types of APIs and ones that can operate at different levels, including:

  • Secure messaging APIsSecure Messaging APIs are the APIs that send and retrieve data. They usually do this by leveraging a standard email address or an internal one derived from a user’s account number. Look for APIs that can handle many types of data, including encrypted emails, files and form data.
  • Administrative APIs: These APIs perform administrative tasks. Look for things like password reset, managing users and their account settings and integrating with Single Sign-On (SSO).
  • Provisioning APIs: When the use of your application takes off and grows, so must your API. Look for the ability to programmatically provision service and on-board new users.

2. Full Support from the API Provider

In addition to standard consulting and ongoing technical guidance, look for:

  • Software Development Kits (SDK): Use SDKs with multiple language support, including C#, VB.Net, Java and PHP, along with SOAP and REST protocols.
  • Technical reference guides: These guides accurately document each API function and data structure. Sloppy documentation could indicate subpar operations.
  • Demos: Invest in demos for each supported programming language. Include working sample applications with documented source code that demonstrates the implementation.

3. Pre-Production Sandbox Environment

You’ll also want to consider investing in APIs with a pre-production sandbox environment. These are full-service, contained environments that allow you to create, test and preview your application. Pre-production sandbox environments help make the transition smoother — they let you iron out the bugs before implementing your API.

Guide to Choosing the Right Email Encryption API for Your Business

Choosing the right email encryption API means analyzing your business needs. Getting an email encryption API that can deliver security and functionality is essential. API-based email security ensures your communications remain compliant and safe across the company.

The Power of API-Based Email Security

APIs are critical for boosting your email security. With API-based encryption, you can automate data protection for safer, easier messaging. Look for features like end-to-end encryption and support for encryption key management practices. A good API will also integrate with your current email infrastructure. This allows you to implement better security without disrupting workflows. Your business will enjoy secure communication with strong, integrated API and compliant encryption.

Check out our API developer site CTA

Unpacking API Encryption in Transit

Getting the right email encryption API means understanding how API encryption works. Encryption in transit means securing your communication and preventing unauthorized access to information as it makes its way from point A to point B.

API encryption in transit will usually use industry-standard protocols like Transport Layer Security (TLS) to establish a secure communication channel. When someone sends an email, the API encrypts the message, making it unreadable to any unauthorized entities. TLS ensures your encrypted data remains confidential as it’s sent and received.

Additionally, the API might use other advanced algorithms to make the data more secure. These algorithms give your emails an extra layer of protection — if someone intercepts the encrypted data, they can’t read it without the right decryption key. A strong API ensures your messages get the security they need, protecting your businesses from cyber threats.

Addressing IT Professionals’ Concerns

As the world becomes more digital, IT professionals must work through challenges to create effective security solutions. Email encryption APIs deliver excellent security, but they can come with drawbacks. Understanding IT professionals’ challenges and how to solve them will help make your business more secure.

Tackling Common Challenges with Email Encryption APIs

All security comes with challenges — APIs need the right measures and integration to ensure they work. Let’s take a look at how you can address some of the common API challenges:

  • Integration complexity: Integration complexity problems are common when deploying email encryption APIs. IT professionals work hard to ensure seamless integration with existing email systems. Getting integration right can slow down encryption measures, creating more vulnerabilities. With APIs that seamlessly integrate, you can cut this issue.
  • Key management: Effective key management is essential for good email encryption. IT professionals often deal with issues around key generation, secure storage and regular rotation. Handling cryptographic keys manually can lead to frequent errors and security problems. Simplifying and automating key management processes is crucial for maintaining communication security.
  • Usability: Getting users to adopt email encryption practices depends on your API’s usability. If the encryption process is difficult, employees may struggle to integrate it into their workflows. IT professionals must balance security and user-friendliness for their security solutions.

How DataMotion’s Solutions Enhance Email Security

DataMotion works to streamline your API integration and use, making email security strong and simple. Our software meets the needs of IT professionals while enhancing email security through streamlined, robust and user-friendly solutions. DataMotion’s expert team uses a comprehensive approach to help your organization navigate API challenges. Some key DataMotion solutions to common issues include:

  • Streamlined integration: DataMotion addresses integration concerns by providing email encryption APIs with seamless integration capabilities. Our solutions are engineered for compatibility with diverse platforms, ensuring IT professionals can easily implement encryption measures without disrupting workflows.
  • Automated key management: DataMotion also offers automated key management, streamlining your cryptographic processes. With DataMotion handling key management, your IT professionals will have less stress, and you’ll reduce the risk of key-related security incidents.
  • Intuitive user interface: DataMotion prioritizes usability with an intuitive user interface. This ease of use means email encryption becomes more accessible for your end-users. We work to ensure your employees can quickly navigate and use our expert encryption features.

Improve Your Email Security with DataMotion

Take the next step in email security with DataMotion. DataMotion’s secure, user-friendly solutions deliver robust API-based security for many organizations. Whether you’re dealing with integration complexities, key management issues or clunky user interfaces, DataMotion has solutions tailored to boost your email security.

Reach out to our sales team for more insights into how DataMotion can help meet your email encryption needs. If you want to explore our secure options, contact us for a demo today!

Updated January 16, 2024

Are our APIs right for your email encryption solution? Try them out with a free trial.

Free Trial