You can integrate a direct secure messaging API into your application by creating a DataMotion API account, generating API credentials, and using secure API requests to send encrypted messages. With the DataMotion Postman collection, developers can test a first secure message in about 15 minutes and start building secure exchange into existing workflows.
The DataMotion platform provides HIPAA-compliant and HITRUST-certified infrastructure for healthcare, financial services, and the public sector.
When sending any sensitive information over the Internet, such as bank statements, payroll data, insurance claims, medication details, or even your home address, it’s important to ensure that your data is protected on its journey from your sent box to the recipient’s inbox. This is where DataMotion’s secure message delivery API, with its end-to-end encryption, comes in handy.
The Secure Message Delivery API
DataMotion, Inc. is an API company specializing in secure data transfer. Our secure message delivery API uses end-to-end encryption, which allows you to send a secure message to anyone with a valid email address while protecting the contents of your messages in transit. In addition to securely sending messages, the API allows you to track and retract your messages as well.
In this guide, I will walk you through creating a DataMotion account and getting started with our secure message delivery API.
What You Will Need to Get Started
For this tutorial, you will need the following:
A Postman account to test the API
Send Your First Secure Message in 15 minutes: Step-by-Step
Follow these five steps to integrate secure messaging into your application.
Step 1: Create Your DataMotion API Account
The first step to utilize the DataMotion secure message delivery API is to create a DataMotion account. To do so,
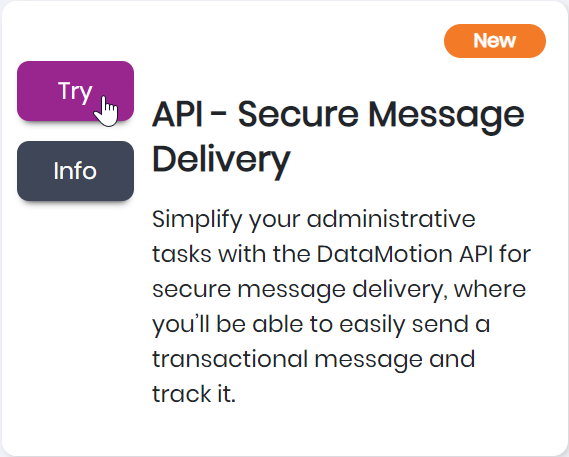
- Visit datamotion.com/portal, where you’ll see available plans displayed on the page
- Locate the ‘Secure Message Delivery’ bundle
- Click the ‘Try’ icon to begin signing up
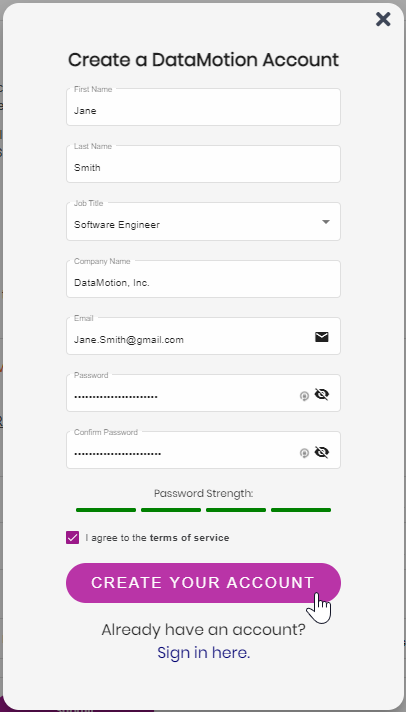
- Click the ‘Login’ button in the top right corner
- Select ‘Sign up Here’ at the bottom of the login pop-up
- Complete the registration form and create a secure password
- Review and agree to the terms of service
- Click ‘Create Your Account’
Once your account is set up, you’ll receive:
- Access to your private API dashboard
- $25 balance automatically credited to your account for API testing
- Secure direct messaging address for your account
- Ability to create applications and generate API credentials
Your account dashboard becomes your central hub for monitoring API usage, managing credentials, and tracking your credit balance.
Step 2: Create an Application and Generate API Credentials
API authentication requires two pieces of information: an API key and an API secret. These credentials authorize your application to send messages through DataMotion’s secure infrastructure. The key and secret will be tied to an application for organizational purposes. You can generate multiple applications to organize your users and environments.
To generate credentials:
- Log in to your API dashboard at datamotion.com/portal.
- Navigate to ‘Applications’ in the left sidebar menu.
- Click ‘Create Application’ to generate a new credential set.
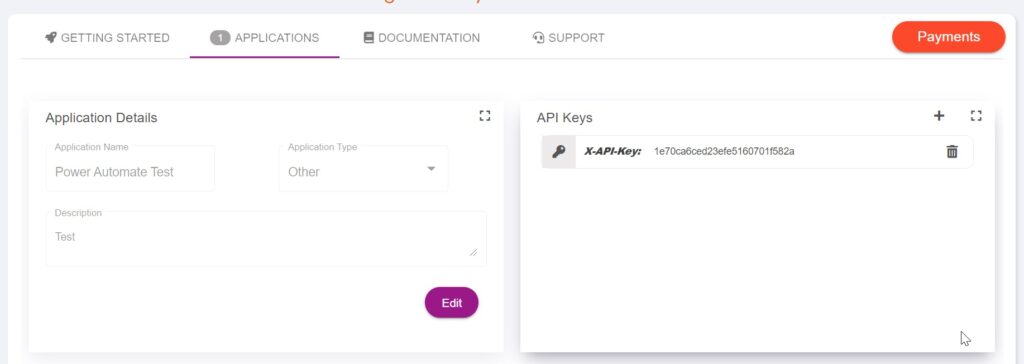
- Provide an application name and description.
- Select ‘Other’ for the application type and provide a description.
- Select the ‘plus’ sign (+) in the center of the ‘API Keys’ section to the left of the ‘Application Details.’
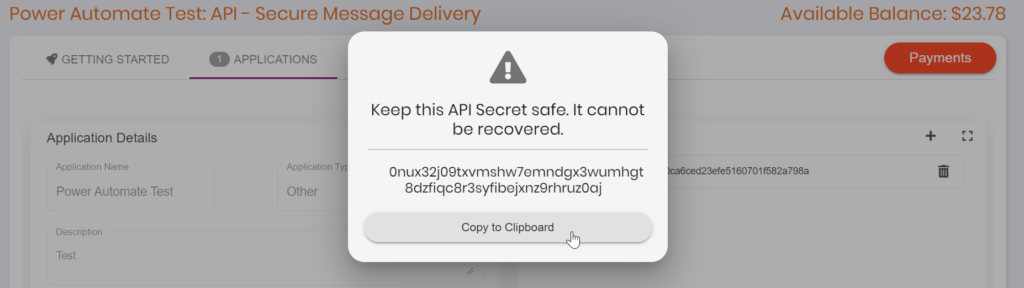
- Copy the API secret from the pop-up and store it somewhere safe.
- Once you copy the secret, the pop-up will close. Navigate to the ‘API Key’ section to find your new API key.
Note that your API secret displays only once. Copy both the API key and API secret immediately and store them securely. These credentials function like passwords, so never commit them to public repositories or share them via unsecured channels. If you lose your API secret, you’ll need to generate a new credential pair.
Once you copy the secret, the pop up will close and in the ‘API Key’ section you will find your new API key. We will be using this key as well, so be sure to have it handy.
Step 3: Download Postman Collection
Now that your application is configured, and your API secret and key have been generated, it’s time to test our API. There are a few ways to test, but for this tutorial, we will use Postman, an API testing tool.
Note: You can find Postman tips and tricks on DataMotion’s Twitter and LinkedIn pages, as well as Postman demo videos on our site.
To download the Postman collection:
- Navigate to the DataMotion ‘SecureMessage-Postman-Collection’ on GitHub.
- Click the green ‘Code’ button to download the JSON file needed.
- Select ‘Download ZIP.’
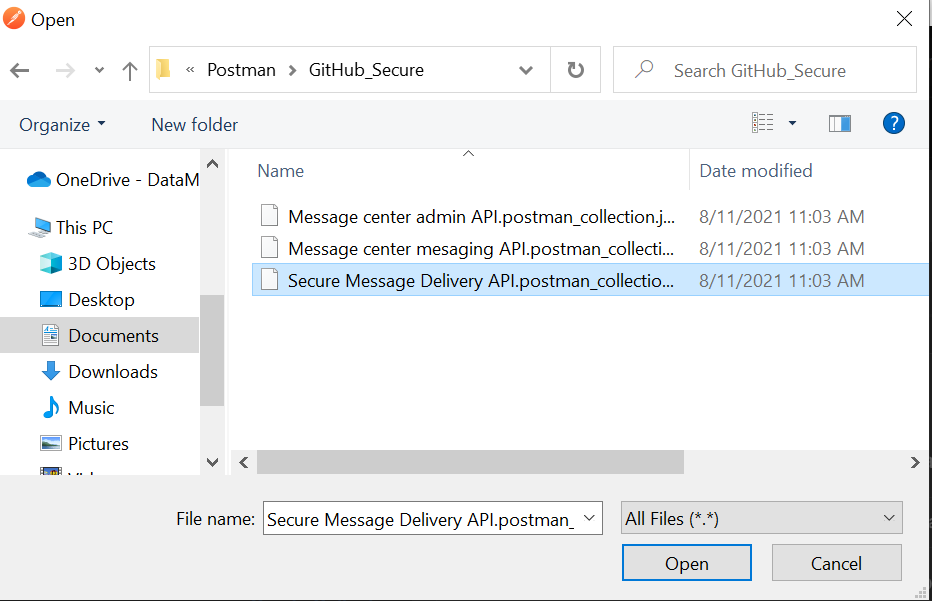
- Save and extract the ZIP file to your computer. The file contains three JSON files.
- Open Postman application.
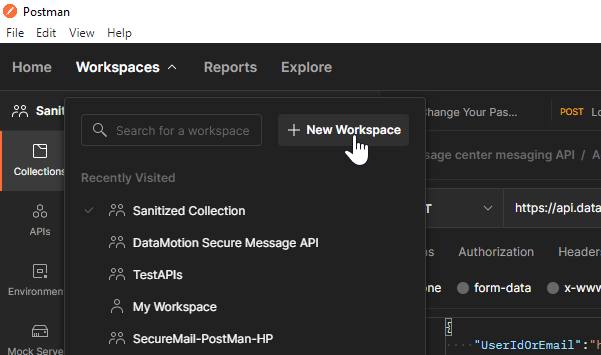
- Click ‘Workspaces’ in the top left of the screen.
- Select ‘+New Workspace.’
- Name your workspace ‘DataMotion Secure Message API’ and select ‘Create Workspace.’
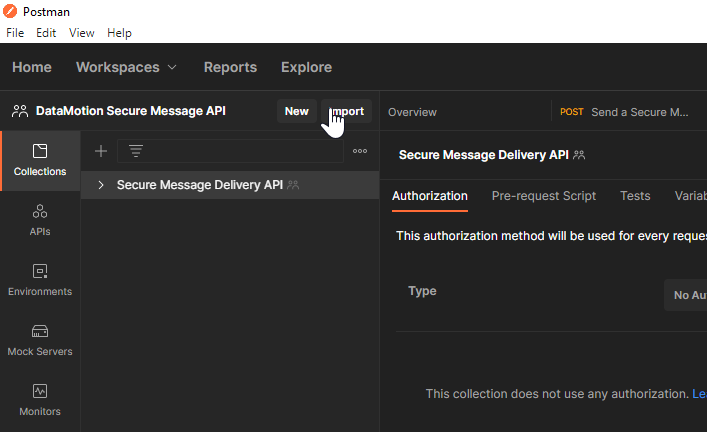
- In your new empty workspace, click ‘Import.’
- Under the new file tab, select ‘Upload Files.’
- Navigate to the extracted JSON file from your downloads and click ‘Open.’
- Once the file is opened, select ‘Import.’
You have successfully imported the DataMotion secure message delivery API collection! The collection will appear in your workspace with pre-configured API requests ready for testing.
In the page that appears, name the collection ‘DataMotion Secure Message API’ and select ‘Create Workspace.’ You will now have an empty workspace in which to populate the secure message delivery API collection. Select ‘Import’ (located under the ‘Workspaces’ option) which you will see to the right of your workspace name.
Step 4: Configure Environment Variables in Postman
Before testing requests, set up these critical variables that authenticate your API calls:
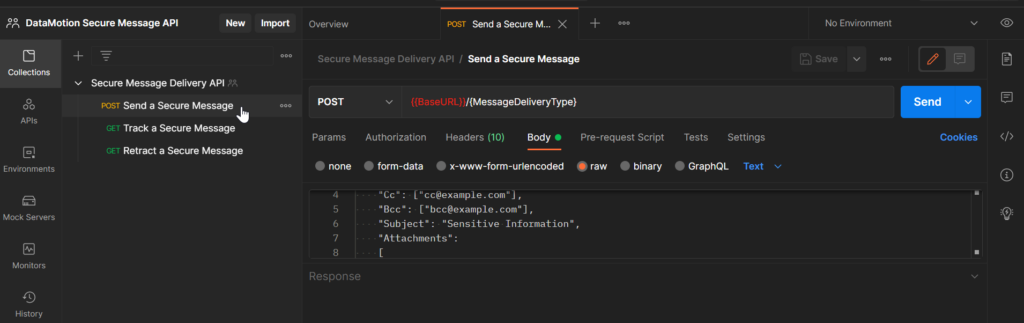
- In Postman, open the DataMotion collection and select the request labeled ‘Send a Secure Message.’
- In the request URL textbox, locate the {{BaseURL}} variable. You can replace the variable directly in the request URL, or you can populate it through the collection settings so the same Base URL applies to every request in the collection.
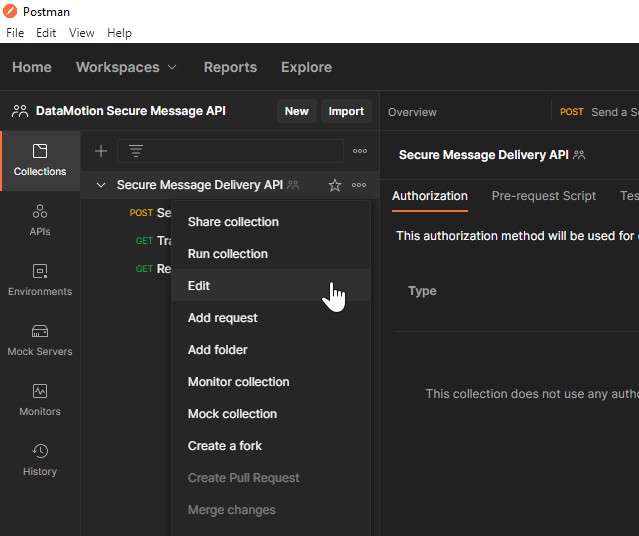
- To populate the Base URL variable through the collection settings, select the ellipsis next to the collection name and select ‘Edit.’
- In the ‘Variables’ tab, find the Base URL variable and add the following URL in the ‘Current Value’ field: https://api.datamotion.com/SecureMessageDelivery/v1.2.
- Return to the request, and in the request URL textbox, replace ‘{MessageDeliveryType}’ with ‘Email’.
- Find the API Key variable ({{UniqueID}}) and the Secret variable ({{SecretValue}}), and paste the API key and API secret you generated and saved earlier.
Now, your Postman collection will automatically authenticate with your credentials for all API requests.
Step 5: Fill Out the Request and Send Your First Encrypted Message
Now you’re ready to test the ‘Send a Secure Message’ request:
Congratulations, you have sent your first secure message!
With the request URL and variables configured, select the ‘Body’ tab and confirm that the ‘raw’ option is selected above the request textbox.
Review the JSON outline in the request body and replace the dummy data with your test message details:
From: The ‘From’ address will be the address you are sending the secure message from. Enter the address with which you created the API secret and key.
To: The ‘To’ address can be any mailbox address. To test, you can enter the same address you used for the from address or any address you have access to.
Cc (optional): Enter any additional email address that has a corresponding mailbox you would like copied.
Bcc (optional): Enter any additional email address that has a corresponding mailbox you would like to blind copy.
Subject (optional): Enter the subject of the email. For this test, you will put ‘HR – New Hire Form.’
Attachments (optional): To add an attachment, you will need to provide the base64 string, content type, FileName and ContentID. There are a few additional steps to automatically gather this information, but for today’s demo, you can leave this section blank.
HtmlBody (optional): In this section, you can add HTML text to send in the body of the message. For this example, you can keep this section blank.
TextBody (optional): Outline the body in plain text and add the information you collected from the new hire form.
Once the request is fully configured, select ‘Send’ at the top left of the screen. In the response section, located directly below the request textbox, you should see a 200 HTTP status as well as your message ID and message expiration date.
To ensure the message is delivered, navigate to the inbox of the recipient address specified in the request. You should see a secure message waiting in your inbox.
In the request URL textbox, you will see a variable for the Base URL. You can replace the variable shown as ‘{{BaseURL}}’ or populate it through the collection’s variable list so this will be represented in all three of the collection’s requests.
To populate the variable, select the ellipsis next to the collection name and select ‘Edit.’ In the Variables tab, next to the Base URL variable add ‘https://api.datamotion.com/SecureMessageDelivery/v1.2’ in the ‘Current Value’ section.
Once the Base URL variable is populated, return to the request. In the request URL textbox replace ‘{MessageDeliveryType}’ which comes after the Base URL, with ‘Email’.
Ready to Integrate Secure Messaging Into Your Application?
You’ve learned how DataMotion’s secure message delivery API enables HIPAA-compliant, encrypted communications without infrastructure complexity. From your first test message to production deployment, the DataMotion platform delivers enterprise-grade security with developer-friendly simplicity. This functionality can be extended to your employees and customers, as our APIs make it extremely easy to seamlessly integrate secure messaging into your current apps and customer portals.
To start building today, contact our sales team to create your free developer account or to discuss enterprise pricing and support options.