
How to Use the DataMotion Connector with Power Automate

Microsoft’s Power Automate allows users to robotize everyday tasks. This automation process streamlines workflows, negates human error and, most importantly, removes tedious tasks from employees’ workloads. Power Automate makes it extremely easy to integrate with the applications and tools you use every day. You can automate tasks in any application that has a Power Automate connector such as Salesforce, DocuSign, and Excel.
Now you can integrate DataMotion’s secure message delivery technology in your workflows as well via the DataMotion – Power Automate connector. This allows you to securely and automatically send the sensitive data you have acquired to ensure PII, PHI and PCI are handled correctly, every time.
Prerequisites to Integrate with Power Automate
To demonstrate how to integrate DataMotion’s secure message delivery in automated workflows, this tutorial walks through a scenario where sensitive information, such as a bank routing number, needs to be collected from a new hire and sent to HR to complete the onboarding process.
In order to complete this tutorial, you’ll need the following:
- A Microsoft account with Power Automate and Forms access
- A DataMotion account to make API transactions
Both Microsoft and DataMotion offer free trials to help you get started.
How to Create a Microsoft Account
To create a Microsoft account, navigate to Microsoft’s subscription site, where you see the different subscription options provided. When selecting a subscription, look for one that includes Microsoft forms, as a form will be used in this tutorial.
After you create a Microsoft account, you can then sign up for a trial of Microsoft Power Automate. To do so, click here.
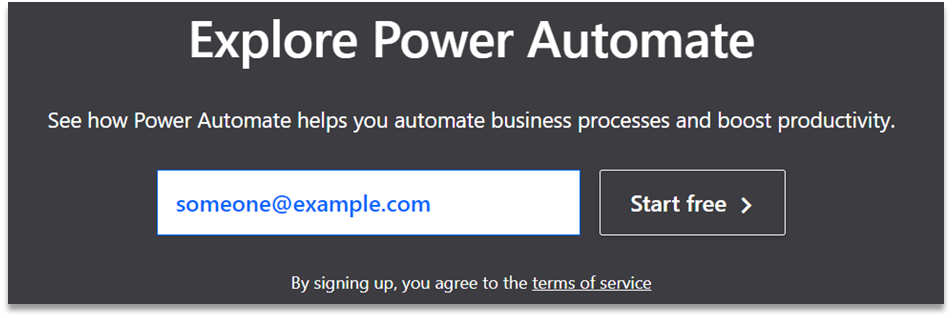
The document that appears shows you how to sign up and sign in to Power Automate. To get started, select the ‘Free account’ button at the top right corner of the page.
Once you select the ‘Free Account’ option, you will be taken to a new screen with a blue ‘Start Trial’ button in the center. Select this button.
Enter your email address and select ‘Start free’. You will be brought to a sign-in page where you can enter a password for your account.
Once you have created a password and signed in, you can begin to explore Microsoft’s Power Automate.
How to Create a DataMotion API Account
Now that your Microsoft account has been configured, it’s time to login to DataMotion.
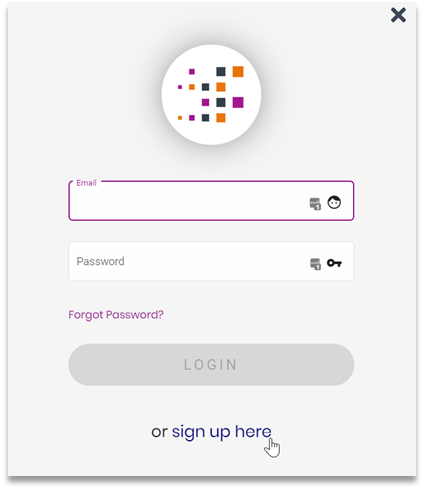
If you don’t yet have a DataMotion account, you can sign up for a trial. To create a DataMotion free trial account, navigate to DataMotion’s Self Service Portal and select the light gray ‘Login’ button in the top right corner.
A new pop up will display with the option to sign in or create a new account. For the latter option, select ‘sign up here.’ at the bottom of the pop up.
Once selected, you will see a request for some basic information such as your first and last name, job title, company, and email. The last section allows you to create a password. Enter the required information and create your secure password.
Next, review and agree to the terms of service by selecting the bold “terms of service” text under the password strength indicator. Once reviewed, check the box next to “I agree to the terms of service”. You will finish the process by selecting ‘Create Your Account.’
Create a Microsoft Form
Now that the prerequisites are handled, I will walk through how to create a Microsoft form. In this demonstration the workflow will be triggered by a form submission and the information submitted in this form will be used to populate the body of your secure message. Therefore, the form must be created before moving forward.
To get started on creating your Microsoft form, navigate to https://www.office.com/launch/forms and sign in with your Microsoft account credentials.
Once you have signed in, you will see your existing forms, if any, as well as an option to create a new form at the top of the page. Select this ‘New Form’ button to get started.
Configure a New Form
In this section I’ll review how to create an example form that can be used to onboard a new hire. Feel free to make your own customization as needed.
Once you have selected the ‘New Form’ button, a new page will display. Click on ‘Untitled Form’ and in the first text box, enter in the title ‘New Hire Form.’ In the ‘Description’ text field below enter ‘New hire form to gather information to complete onboarding process.’
Create Form Questions
Now that the form is configured, you can begin to build the questions needed in this form. To do so, select the ‘Add New’ button and choose the ‘Text’ option. This will create the first question and will provide a textbox to allow users to type in their answer.
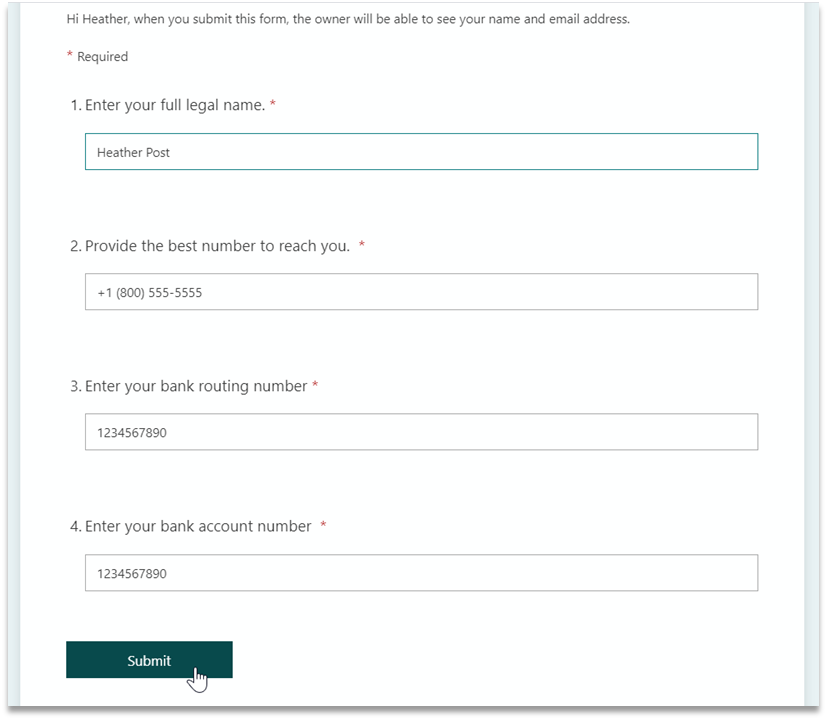
For this example, add a question for the user to enter their full legal name. To do this, select the first text box and type ‘Please enter your full legal name.’ Be sure to mark this question as required if this will be a mandatory question to fill out.
Continuing with the new hire example, three additional pieces of information will be needed. To add these questions, repeat the above process three more times, entering the following commands:
- Provide the best number to reach you.
- Enter your bank routing number.
- Enter your bank account number.
When you are finished, the end-result should look similar to the picture below. When you are done entering questions, select the ‘Share’ button in the top right-hand corner of the page.
After clicking ‘Share’, a link will be provided. Copy the link and store it in a safe place. You will need this link later to test your Power Automate workflow.
Congratulations! You have created your first Microsoft Form. For this scenario, this form can be sent to all new hires to provide their onboarding information.
How to Integrate DataMotion with Power Automate
Now that the form is configured, you can build a Power Automate workflow to automatically pull information from this form and send it securely to a recipient of your choice, every time the form is submitted.
To begin building a workflow, first navigate to https://make.powerapps.com/ and sign in with your Microsoft Account.
Once you have signed in you will be brought to a new page, shown below. On the left-hand side of this new page, there is a vertical menu. A little more than halfway down this menu, you should see a ‘Flows’ options. Select this option.
Note: if you do not see the full menu, click on the icon with the three vertical lines, located toward the top left-hand corner of the screen, to expand.
How to Create a Workflow
From here, select ‘New Flow’ at the top of the screen to create a new workflow.
There are a few flow options to choose from, but for this demonstration choose ‘Automated Cloud Flow.’
Next, you need to choose a flow name and trigger. The name will help differentiate between workflows and the trigger will be the event which ignites the workflow. Each connector may provide different triggers.
A popup will appear requesting this information.
- For the flow name, enter ‘DataMotion Integration Test’
- To select the trigger, search for ‘form’ and select ‘When a new response is submitted’
Once the name and trigger are defined, scroll down the page until you see the ‘Create’ button and select it.
Now you have named your workflow and set the trigger, so every time a form is submitted Power Automate will carry out the actions that will be defined in the next section.
How to Configure a Workflow
The next step in this process is to configure your newly-created workflow. As stated, your workflow will now trigger when a form is submitted, but you will need to specify which form you want to use. Select the down arrow next to ‘Pick a Form’ and choose the ‘New Hire Form’ previously created.
Now, whenever the New Hire Form is submitted, this flow will trigger. It’s now time to dictate what actions you want to come next. To do so, select ‘+ New Step.’
How to Gather Information from a Microsoft Form
The first thing you need to do is collect the information the user submitted through the form. Search again for ‘Form’ and select ‘Microsoft Forms.’
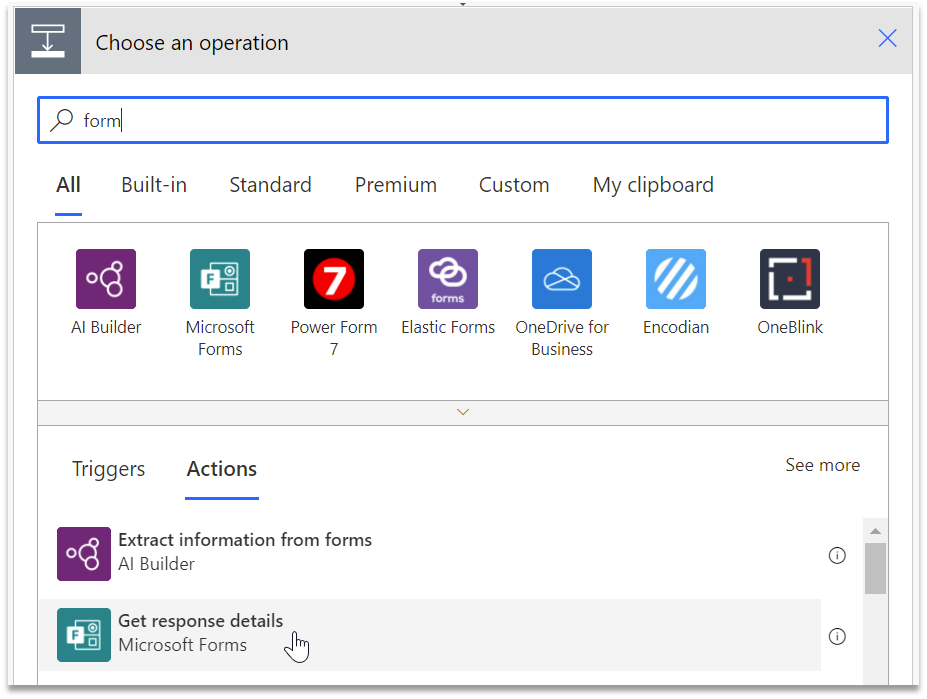
Select the only action provided: ‘Get response details.’ You will need to enter in a Form ID as well as a response ID. When selecting either textbox suggestions will appear below.
- For the Form ID, select the ‘New Hire’ form suggestion.
- For the response ID, choose the ‘Response ID’ from the suggestions.
Power Automate will collect the response ID when the form is submitted, so that parameter is passed in to the workflow automatically.
How to Send Information Securely
Now that you have gathered all the form responses, the next step is to send them securely. In order to do this, you will need to add an additional workflow step.
To do this, select ‘+ Next Step’ and search for “DataMotion” to find the DataMotion connector. You can do this by typing ‘DataMotion’ in the search bar at the top of the section.
Once selected, you will see a list of actions associated with this connector. Choose ‘Send Secure Message’ as the action.
A new widget will display the secure message request. Below, I will walk through each section of the request and provide example entries. Keep in mind you may need to customize these fields to properly test (especially the ‘To’ address!).
Version
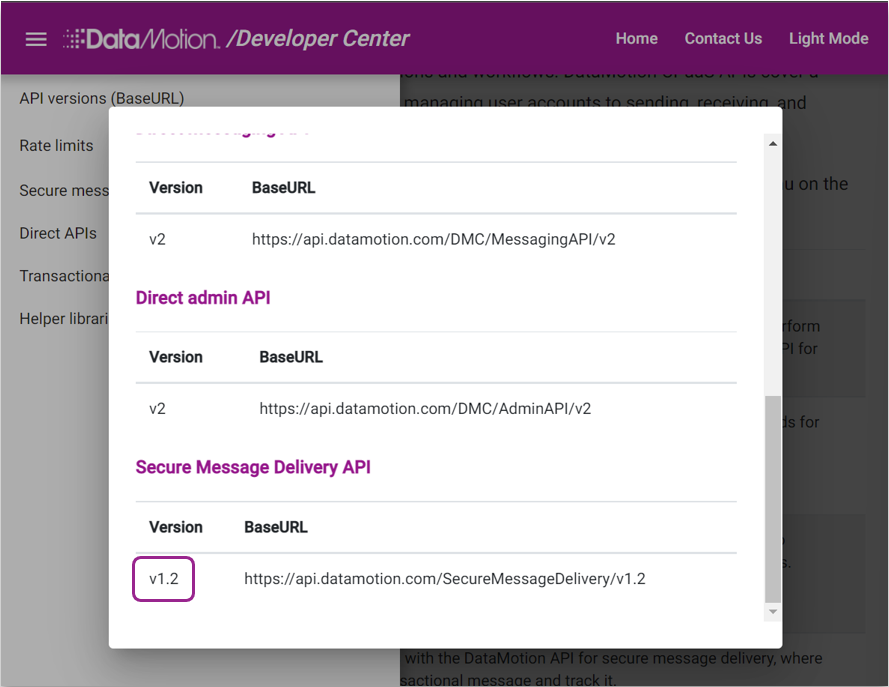
V– this section is asking for the version of the DataMotion API you are using. You can find the version of the API in DataMotion’s Developer Center. Select the first option on the left-hand menu: “API versions (BaseURL)”. Then scroll to locate the Secure Message Delivery API to find the associated version number. (Below, the version is 1.2)
X-API-Secret
To get the API secret key, navigate back to the DataMotion self service center and sign in. Once you have signed in, a new tab should appear titled ‘Applications.’ Select this tab.
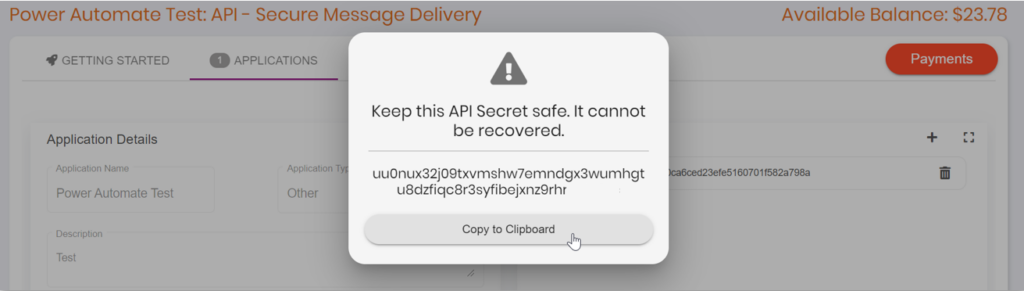
- From here, select the ‘Create Application’ button and give the application a name. Then select ‘Other’ for the Application Type and provide a description.
- Select the ‘plus’ sign (+) in the center of the API Keys section and copy the API Secret that is provided in the pop up. Paste this key into the X-API-Secret text box in Power Automate
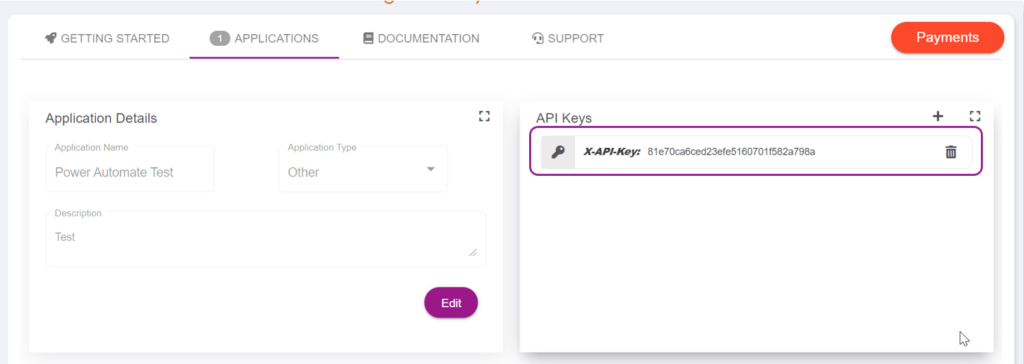
X-API-Key
In the API Key section copy the key provided and paste it in the X-API-Key section in Power Automate.
From
The ‘From’ address will be the address you are sending the secure message from. Enter in the address with which you created the API Secret and Key.
To
The ‘To’ address can be any address with a mailbox. To test, you can enter the same address you used for the from address or any address you have access to.
Cc (Optional)
Enter any additional email addresses that have a corresponding mailbox you would like to copy.
Bcc (Optional)
Enter any additional email addresses that have a corresponding mailbox you would like to blind copy.
Subject (Optional)
Enter the subject of the email. For this tutorial enter: ‘HR – New Hire Form’
Attachments (Optional)
To add an attachment you will need to provide the file’s base64 string, content type, FileName and ContentID. There are a few additional steps to gather this information automatically but for the demo today you can leave this section blank.
HtmlBody (Optional)
In this section you can add html text to send in the body of the message. For the example, you can keep this section blank.
TextBody (Optional)
Here outline the body in plain text and add the information you collected from the new hire form.
When clicking in each of the textboxes you will see ‘Insert parameters from previous step.’ In this case, the parameters you will see suggested are the responses previously pulled from the ‘New Hire’ form. Therefore, you will be able to enter the responses from the ‘New Hire’ form in the body of the email.
For this example, label the information so your recipient will know which field each piece of information correlates to, as shown below.

Once you have finalized your configurations, select ‘Save’. You will see a message confirming your workflow has been saved at the top of your screen!

Now you have created a workflow that incorporates the DataMotion secure message delivery API!
Test the DataMotion – Power Automate Integration
The workflow is configured and ready to test! You will want to test it to confirm your workflow runs as expected and ensure your recipient receives a secure message with the correct information.
To trigger your workflow you will need to submit a new hire form. To do this, you will need to go back to the safe place that has the link you saved after creating the form.
Note: If you misplaced this link, go to https://www.office.com/launch/forms and select ‘New Hire Form.’ Once the new hire form is displayed, select ‘Share’ and copy the link provided.
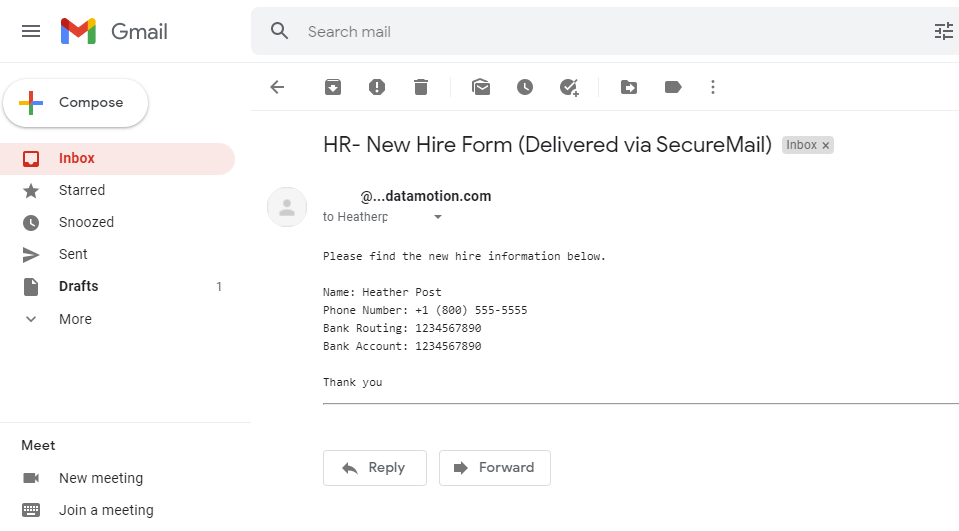
The new hire form will be displayed on this site. Fill out the form with test data and hit ‘Submit’ at the bottom of the page.
Once your form is submitted, navigate to the inbox of the to address you defined in the workflow. You should see your secure message there with the test data submitted in the form.
Conclusion
By integrating DataMotion into your Power Automate workflows, you are streamlining security. You can ensure sensitive and critical data is handled in a safe manner and sent to the correct address, every time. In today’s tutorial, we went through an example of how to send sensitive new hire information to HR. This can be quickly accomplished by creating a simple Microsoft Form, followed by a Power Automate workflow, that will collect the form’s data, add it to a secure message and securely send the message to your HR recipient.
Now that you have the basics down, you can continue to add the DataMotion connector to your workflows. If you have any questions, please feel free to contact our DataMotion support team. If you would like to utilize this technology in your applications and customer portal, check out our API documentation today!
Get Started Today
Learn more about our secure message delivery API, contact us to get started.